1. Introduction
Welcome to the Koretel PBX call center system. This manual will guide you through the process of logging in as an agent and managing your calls effectively. The Koretel PBX system is designed to streamline call center operations and provide a user-friendly interface for handling customer interactions.
2. Accessing the System
System Requirements
- A modern web browser (Chrome, Firefox, Edge, or Safari)
- Your assigned username and password
- Your assigned extension number
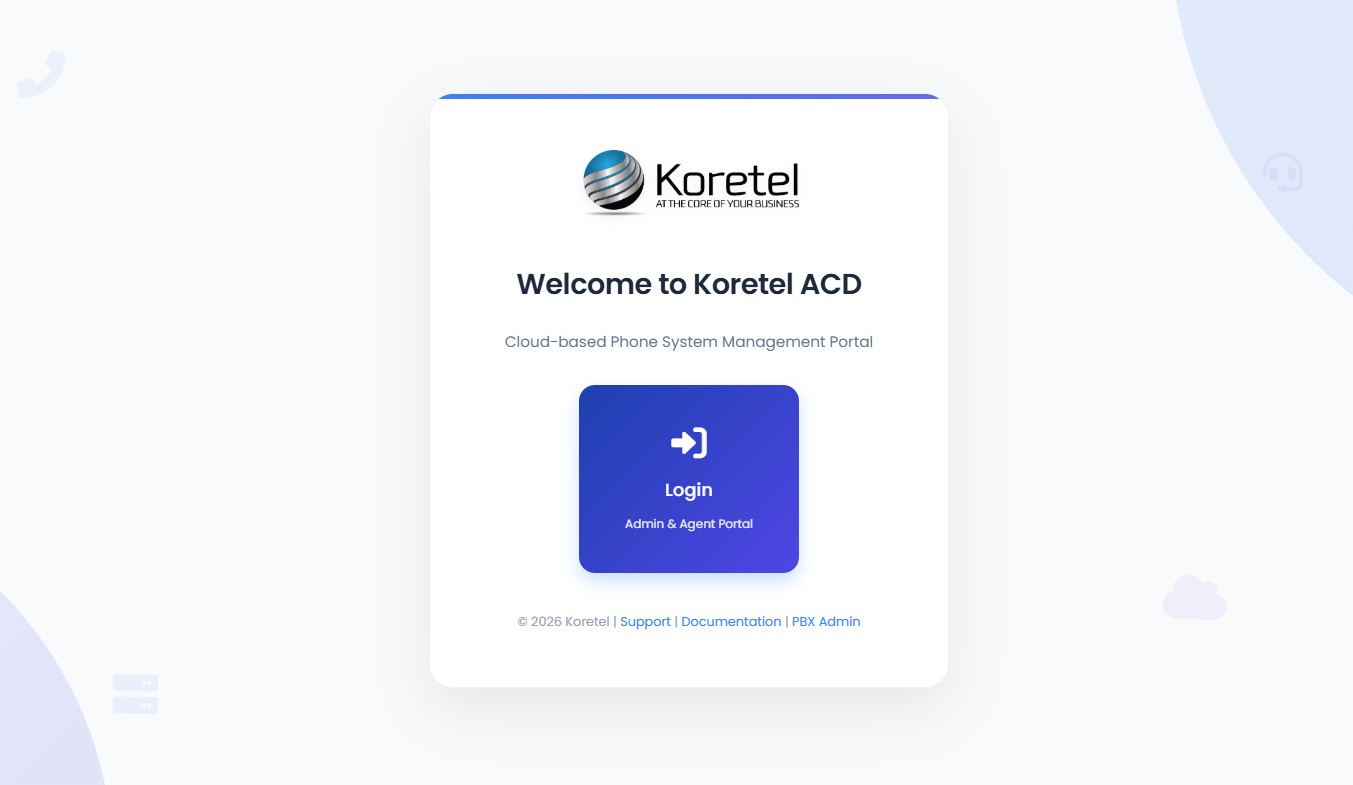
Accessing the Login Page
- Open your web browser
- Enter the Koretel PBX URL in the address bar:
- You will be directed to the main page with the Koretel logo
- Click the Login button to access the unified login page
3. Agent Login Process
Step 1: Access the Login Page
On the main page, click the Login button. You will be taken to the unified login page where both administrators and agents sign in from the same form.
Step 2: Enter Your Credentials
On the unified login page, enter the following:
- Username - Your assigned username
- Password - Your personal password
- Enable Agent Mode - Check this checkbox to expand the agent options
- Extension - Type your assigned extension number (e.g., 1001)
The Enable Agent Mode toggle is what differentiates an agent login from an admin login. If you do not check this box, you will be logged in without agent capabilities. Make sure to enable it and enter your extension to receive calls.
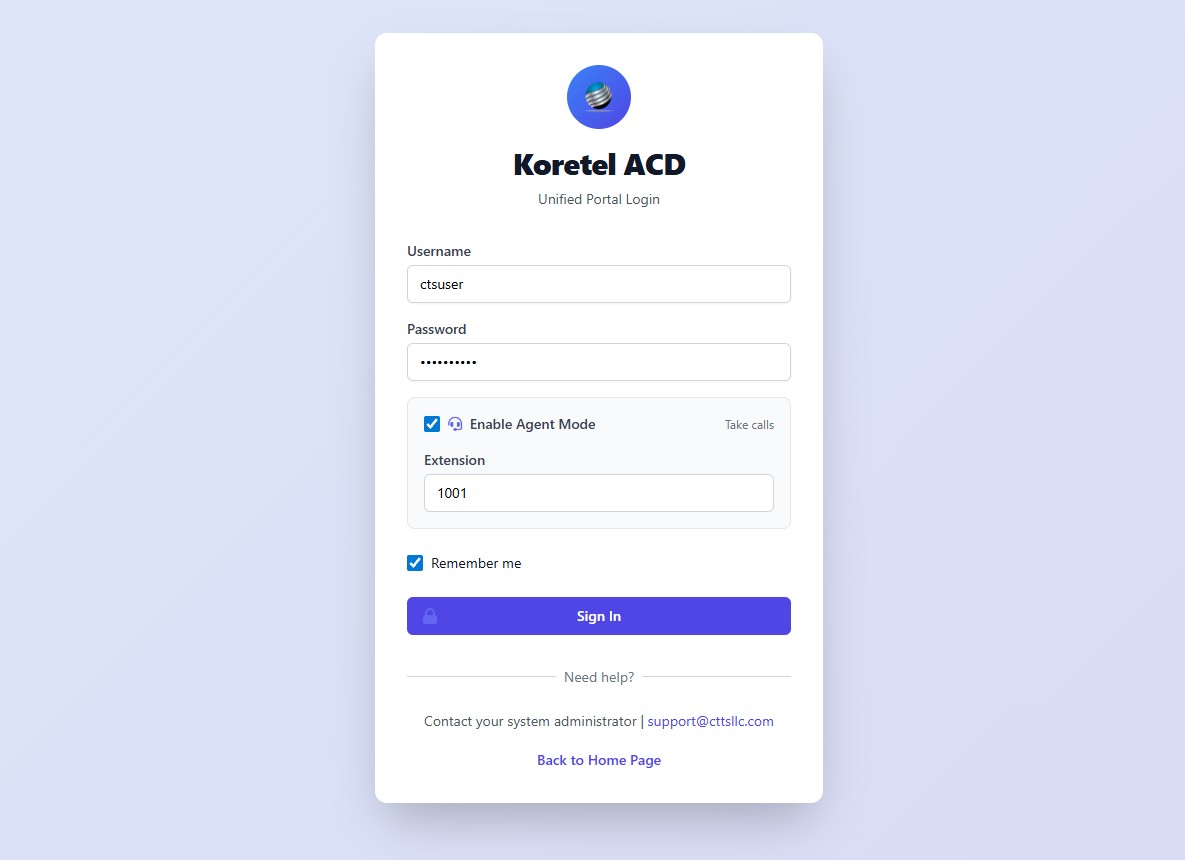
Step 3: Complete Login
Click the Sign In button to access your agent dashboard.
You may also check Remember me to save your username and agent mode preferences for next time.
If your username or extension is already logged in from another location, you will see a "Session Already Exists" warning. You can choose to Force Login (which will disconnect the other session) or Cancel and contact your administrator.
If you see a browser prompt asking to update or save your password, you can choose based on your organization's security policy.
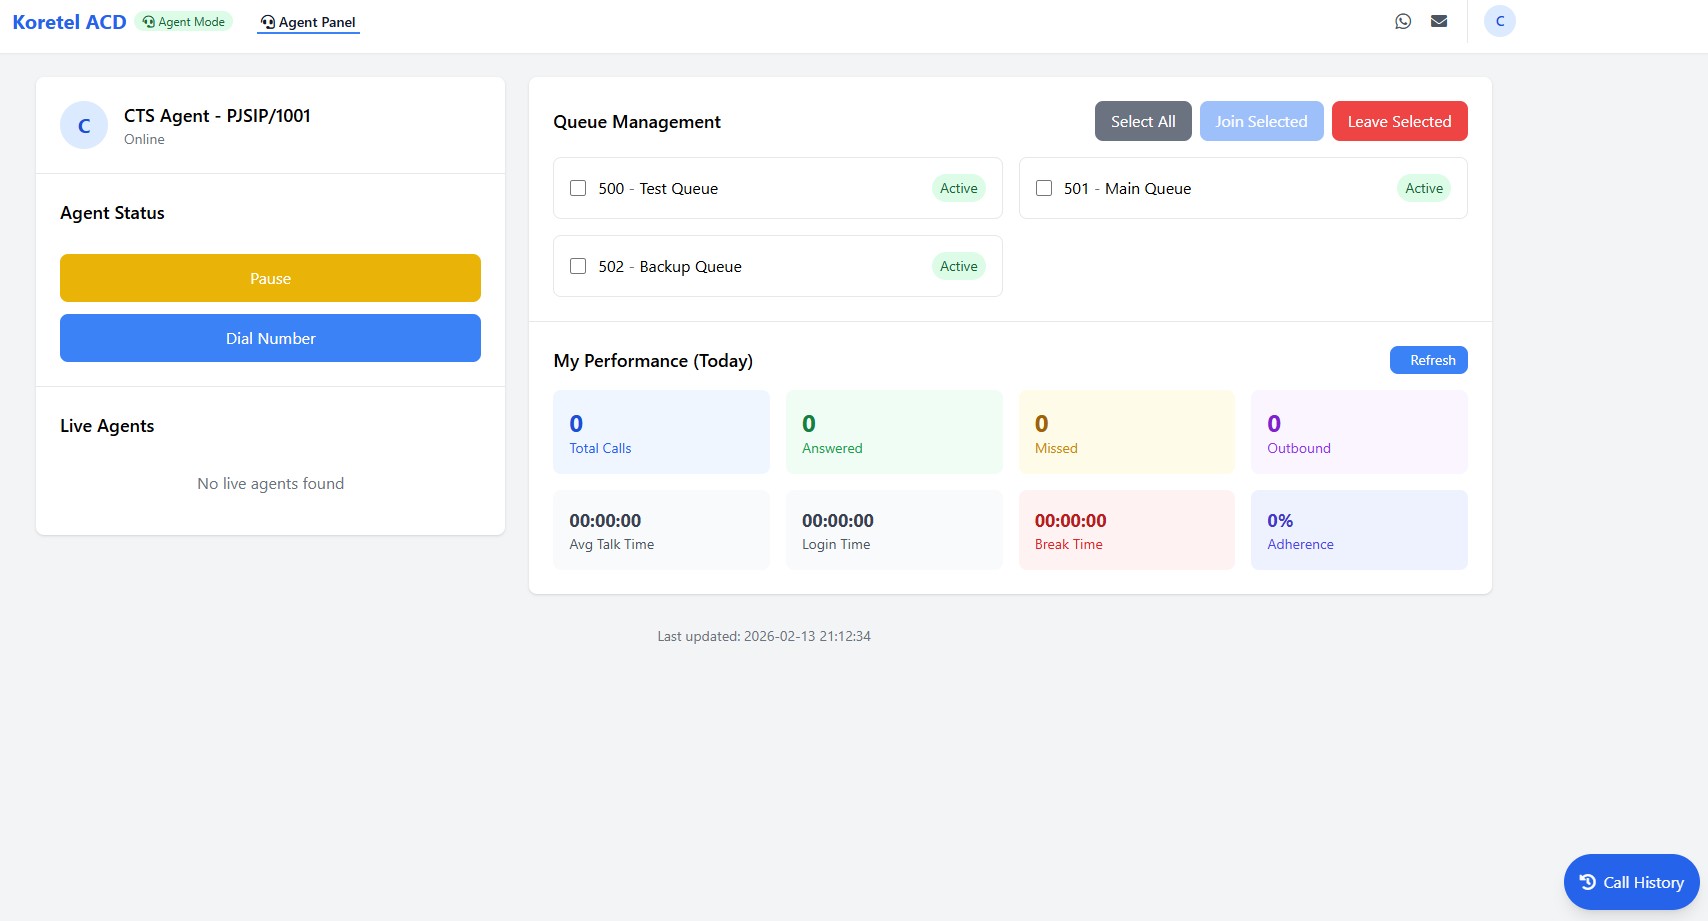
4. Dashboard Overview
After successful login, you will see the Agent Dashboard with several key sections:
Agent Information Panel (Left Side)
- Your name and extension number (e.g., "CTS Agent - PJSIP/1003")
- Status indicator (Online/Offline)
- Agent Status controls
Queue Management Panel (Right Side)
- List of available queues
- Queue status indicators
- Queue join/leave controls
5. Queue Management
Queue Status Types
Each queue will show one of these status indicators:
- Inactive - You are not currently logged into this queue
- Active - You are logged in and available to receive calls from this queue
Joining Queues
- Select the checkboxes next to the queues you want to join
- Click the Join Selected button
- The status will change from "Inactive" to "Active" for selected queues
Leaving Queues
- Select the checkboxes next to the queues you want to leave
- Click the Leave Selected button
- The status will change from "Active" to "Inactive" for selected queues
Managing Multiple Queues
- Use Select All to select all available queues
- Use Deselect All to clear all selections
6. Handling Calls
Setting Your Status
Before handling calls, ensure your status is properly set:
- Online - Default status when logged in, ready to receive calls
- Pause - Click the yellow Pause button to temporarily stop receiving calls
Making Outbound Calls
To make an outbound call:
- Click the blue Dial Number button
- Enter the phone number you wish to call
- Confirm the call. Your designated phone will ring, once you answer them the outbound call will be initiated.
Call History
To view your previous calls:
- Click the Call History button in the bottom-right corner of the dashboard
- Review the list of inbound and outbound calls with timestamps
Receiving Inbound Calls [Only for WebPhone]
When an inbound call arrives:
- Your screen will display caller information
- Accept the call through your desktop phone or web phone (if enabled)
- After the call completes, you may have wrap-up time before the next call
Call Controls [Only for WebPhone]
During active calls, you may have access to:
- Mute/Unmute
- Hold/Resume
- Transfer
- Conference
- End Call
The exact call control buttons depend on your phone device or softphone interface.
7. Common Tasks and Troubleshooting
Changing Your Status
If you need to take a break or handle non-call work:
- Click the yellow Pause button
- To resume taking calls, click the button again (which will show "Resume")
Profile and Logout Controls
To access your profile settings and logout options:
- Click on your initials icon in the top-right corner of the dashboard
- A dropdown menu will appear with the following options:
- Profile: Update your personal information and change password
- Dark Mode: Toggle between light and dark interface themes
- Sign Out: Securely log out of the system
Always use the Sign Out option when finishing your shift to ensure your account is properly secured.
Browser Refresh
If the dashboard becomes unresponsive:
- Try refreshing the browser page
- If prompted, log in again with your credentials
- Verify your queue selections are correct after refresh
Common Issues
| Issue | Solution |
|---|---|
| Login Issues | Ensure your username, password, and extension are correct |
| Call Audio Problems | Check your headset connection and audio settings |
| Queue Status Not Changing | Try leaving and rejoining the queue |
This manual is intended for call center agents using the Koretel PBX system. For administrative functions, please refer to the Admin Manual.
Last Updated: February 2026